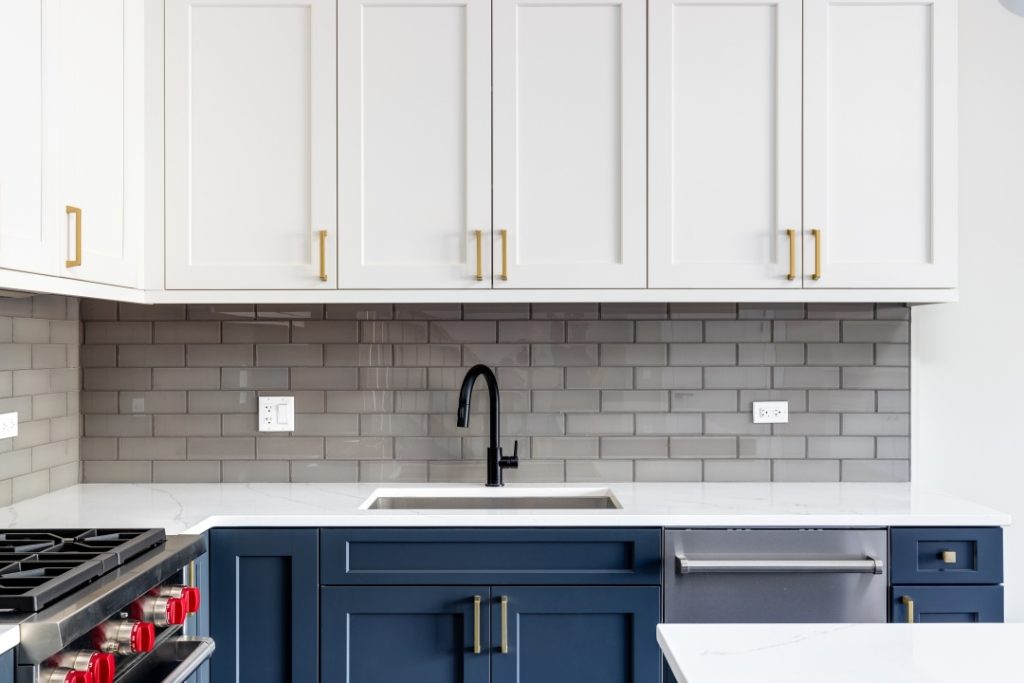
San Jose cabinet refinishing can save homeowners time and money while delivering the fresh kitchen they desire. It’s also a more environmentally friendly option than refacing or replacing cabinets.
Before painting begins, cabinet painters cover countertops and other surfaces with plastic sheeting and brown builder’s paper. Next, doors and hardware are removed and taken to the spray booth.
Inspection
Cabinet refinishing requires detailed, thorough preparation to produce professional-grade results and ensure long-term durability. A reputable cabinet refinishing company will provide expert guidance throughout this phase to reduce mistakes and deliver a flawless aesthetic that transforms the kitchen’s look. During this stage, cabinet surfaces receive a light sanding to smooth out imperfections and create a surface that paint will adhere to. Surface repairs may also be addressed during this process, including repairing cracks and dings that could cause the new finish to flake or peel.
Once the cabinets are prepared, the refinishing company will apply a coat of primer or paint to prepare the surface for refinishing. This step is critical to long-term durability and will help prevent chipping, flaking, or bubbling. The refinishing company will choose a high-quality primer or paint based on the cabinet’s wood type and desired aesthetic. Using specialized techniques, they will apply multiple thin coats to achieve the desired appearance and performance.
The final step is applying the finish of your choice. This step is what makes or breaks the overall aesthetic of your cabinets and can take on a variety of styles, from matte to high-gloss. Once the finish is applied, a sealer is typically added to protect against moisture and daily wear.
Refinishing is a great option for homeowners looking to update their kitchen without breaking the bank. Not only is it more cost-effective than replacing cabinets, but it also saves the energy and resources needed to manufacture new materials. In addition, refinishing supports efforts to reduce construction waste by keeping existing cabinets out of landfills.
Before a cabinet refinishing company begins the project, they will typically advise you to clear countertops and remove personal items from cabinets to minimize dust and damage. This will also make the refinishing process more efficient and allow them to complete the work in a shorter period of time. Additionally, the company will likely instruct you to cover appliances and flooring to protect them from splatter and dust. The refinishing company will then thoroughly clean the cabinets and hardware to remove any dirt, grease, or grime that has accumulated from regular kitchen use. This process can be accomplished with cleaning solutions that are safe for cabinets and do not contain harsh chemicals that could strip or discolor the finished product.
Preparation
Homeowners seeking to transform their kitchens but not willing or able to endure the expense and hassle of a full renovation often turn to cabinet painting. This cost-effective, transformative approach breathes new life into existing cabinetry through a series of detailed steps that ensure lasting durability and appearance.
One critical step in the cabinet refinishing process is surface preparation. Neglecting this critical step can result in poor adhesion and a less-than-impressive finish. During this stage, a skilled professional uses their knowledge of cabinet surfaces and paint types to thoroughly clean the surface to be painted and to repair any blemishes. This thorough approach provides a smooth and even base for the paint, making it more likely that it will hold up to the demands of everyday use.
It is also important to prepare the surface for painting by sanding and priming. It’s crucial to use the correct grit of sandpaper for each area and to follow the grain. After sanding, it is important to wipe the surface down with a tack cloth and to remove any dust particles that could cause unevenness in the final paint finish. Lastly, it is recommended to apply a high-quality primer designed specifically for cabinets. This layer creates a uniform surface, helps achieve the desired color and improves paint adhesion.
Before applying any paint, it’s also a good idea to cover adjacent surfaces and furniture with protective drop cloths. This will help keep any spills or drips from causing unwanted damage and will help the homeowner avoid having to repaint their entire kitchen. It is also recommended to remove any hardware from the cabinet doors and drawer fronts before beginning the refinishing process. This will help avoid getting any paint on the hinges and make it much easier to reinstall them later.
It’s also a good idea to label each door and drawer front with its corresponding hinge location before removing it from the cabinet. This will help the homeowner to reinstall them in the proper order once the project is complete. Lastly, it is important to create a workspace that is clean and organized so the cabinet hardware can easily be removed from each door and drawer front when the time comes to install them back into the kitchen.
Spraying
Cabinet refinishing experts use high-velocity low-pressure (HVLP) spray equipment to deliver a flawless, factory-quality finish. Unlike hand-applied paint, HVLP eliminates unsightly brush strokes and provides a smooth coat that resists chipping, peeling, and wear. This is a critical step to ensuring a long-lasting, durable finish.
Professionals also understand how to use the right tools for the job, from a HVLP gun to an air compressor and filter system. This allows them to achieve a high-quality finish that’s unmatched by DIY enthusiasts.
HVLP spraying also eliminates toxic fumes. This is a huge benefit in busy homes and commercial environments. Traditional finishes like stains and varnishes contain solvents that emit foul-smelling and toxic fumes. The removal and disposal of these chemicals are costly and time-consuming. Professionals can reduce the amount of work required to refinish cabinets, and they can complete the entire process in a fraction of the time it takes a homeowner to do it themselves.
Lastly, professional painting contractors have access to a wide variety of colors and finishes. This gives them the flexibility to express any style, from rustic charm to modern aesthetics. For example, they can transform a classic oak finish into a dark walnut, or they can use a glossy lacquer on MDF to make them appear more like solid wood. The options are endless, and the results are beautiful.
Whether your cabinets are solid wood, MDF, or melamine, they require special preparation to ensure the surface is ready for priming and painting. This includes sanding, degreasing, and priming to prepare the surface for the new layer of paint. It’s important to get these details right, because if the surface is not properly prepared, the finish won’t stick and will start to flake or peel. A sloppy job could take weeks to complete, and you won’t end up with the beautiful cabinets you dreamed of.
Curing
Whether you’re hiring professionals or going the DIY route, realistic timeline expectations prevent frustration and help you coordinate household schedules around project work. A thorough cabinet refinishing process takes time to complete, and it’s important to allow for proper drying and curing between phases. Rushing these stages can result in tacky surfaces that collect dust and debris and damage fresh finishes.
The best way to achieve a durable, long-lasting finish is by using high-adhesion primer and giving it ample time to dry. Professionals typically use spray equipment to apply primer, ensuring consistent coverage and accurate application on hard-to-reach areas and detailed profiles. This allows the bonding agent to properly set for a rock-hard coating that resists chipping and peeling well into the future.
When sanding to prep for painting, it’s critical to remove any oil contamination on the cabinets. Cooking grease, skin oils from your hands, and general kitchen grime can build up and create an invisible layer that prevents paint adhesion. Our degreasing solution breaks down these contaminates and helps the primer and paint grip the cabinet surface.
After thoroughly cleaning, we apply a high-adhesion bonding primer to prepare for the final coats of paint. We then carefully sand with fine grit to roughen the surface, allowing for a smooth and even finish. After sanding, we clean the cabinets again and allow for an adequate drying time.
As a finishing touch, we reattach the doors and drawer fronts and re-install any hardware, double-checking their alignment to ensure a seamless fit and proper functionality. This ensures a beautiful, polished look that also maximizes the lifespan of your cabinets.
A fully cured finish that stands up to daily wear and tear is essential for protecting your investment. Improper curing, insufficient sanding, and shortcuts in preparation and application are among the most common reasons that cabinet paint fails prematurely. Professional refinishing provides the most reliable, long-lasting results possible and helps you avoid expensive mistakes that compromise the integrity of your home’s interior.